Friday, June 28, 2013

Summer is here in Arizona


Summer is here in Arizona!  I just walked out to check the mailbox in my bare feet, ouch - when will I learn?

We've had excessive heat warnings for the weekend with predicted highs of 126 degrees, it looks like maybe that won't happen but who knows?  

If the high temperatures aren't warm enough did you notice our lows? 
These are the temperatures outside just before sunrise here.   

Wednesday, June 26, 2013

Paper Smooches Zoo Crew Hippo Hooray


Our Operation Write Home Stars & Stamps challenge theme today is Clean & Simple, oh my do I struggle!

I've been working on making more CLEAN & SIMPLE cards and thought playing in some of those type challenges would help me develop my skills.  I love how my card turned out but I have to tell you leaving it alone is so very difficult for me! 

I used the Paper Smooches clear stamp set called Zoo Crew for my card.  
The cute hippo is colored with Copic markers:

W1, W3, W5, RV10, RV21

She's cut out and popped up with foam tape just above the banners for a little dimension and texture.

I made the banners using Basic Grey Bittersweet & Ambrosia patterned papers, the envelope liner is from the same Basic Grey Bittersweet collection and made using a Papertrey Ink envelope liner die.  To make my banner ends I used an EK Success square punch.


Attached everything to the one layer card base and stamped the "hippo hooray" sentiment.  
There is a birthday sentiment on the inside, this card is ready to go into my stash of birthday cards.

Thanks for visiting my blog today -

Challenges:
Operation Write Home Stars & Stamps - Clean & Simple + Texture
Make It Monday - Anything Goes

Tuesday, June 25, 2013

Soap Making - Just Good Clean Fun


About a month ago my husband comes home from work and asks if I had a good day, told me the house smells good and asks how I spent my day ...

This is what our kitchen table looked like about an hour before he walked in the front door.  
The soap making aftermath.


I've been wanting to do some photo tutorials of cold process soap making but everything seems to happen so fast that it hasn't happened yet.  Our kids will be out of school in a few weeks so maybe Michael will help me out by taking pictures of the process, he kinda likes chemistry as long as he doesn't have to help clean up  the mess.


Here's what my soap looks like in the mold.

In this batch of cold process soap I tried using Paprika and Spiulina powders to make my green and orange colors, so far so good.  I'll know more once I've un-molded and cut the soap.  I also tried a few swirling techniques I've learned by watching Soaping 101 & Soapstar videos on You Tube.


Here it is out of the mold about 24 hours later.


And then 24 hours after that.  I decided to call it Arizona Back Country because it smells like the Arizona desert after a gentle rain.

Here's my description of it's fragrance:

Close your eyes and imagine with me for a moment if you will, the aroma of the Arizona desert after a gentle rain.  Picture mesquite trees, tall saguaro cactus, desert sage brush and wild rosemary blended with the earthy fragrance of the desert floor.  

This soap is ready to use and for sale in my Sudz n' Hunni Soaps web store starting today!

Thanks for visiting my blog today -

Linky Parties:

Clever Chicks

Frugally Sustainable

Friday, June 21, 2013

Catherine's Caffeinated - RED Silicone Mold Soap Kit


I had to share this soap with you today, it smells heavenly!
The picture above is the four pound loaf of soap being sliced into one inch bars.


It's a Coffee Soap that is scented with Coffee & Peppermint fragrance - wow it's yummy!


This was a kit my friend Dagmar bought from Essential Depot for me to make for her and since the entire loaf goes to her I think I'd better make one for the rest of us too!  

Wednesday, June 19, 2013

Bugaboo Stamps Birthday Monkey

You know... I've never been too fond of monkeys or coloring monkeys until I discovered Jodie's Bug A Boo Stamps monkeys!  I've had a change of heart about coloring monkeys.  

I know, I'm weird!  But it's a fun kinda weird!

For my card I used one of the cute monkeys in the Birthday Monkey collection and my card is for our Operation Write Home Stars & Stamps Midweek Throwdown challenge this week.  The theme is Cards 4 Kids.

I colored the image with Copic markers to match my digital paper I found recently at My Grafico.  Copic markers - YG01, YG093, W0, W1, R27, RV25, RV23, E42, E43, E44, E74, E71, E70, RV00.

My layout is SC314 from Splitcoast Stampers.  The other cardstocks I used are Papertrey Ink Raspberry Fizz & Stampin' Up! Old Olive.  

Thanks for visiting my blog today -

Challenges:
Make It Monday - Anything Goes

Tuesday, June 18, 2013

Homemade Laundry Soaps


I made laundry soap recently and have a tutorial and recipes for powdered and liquid laundry soaps.
I have to say making the batch of liquid laundry soap was quite an adventure!

Above I have the supplies used to make laundry soap:

1 gallon Distilled Water
Homemade Lard Soap
Borax & Washing Soda


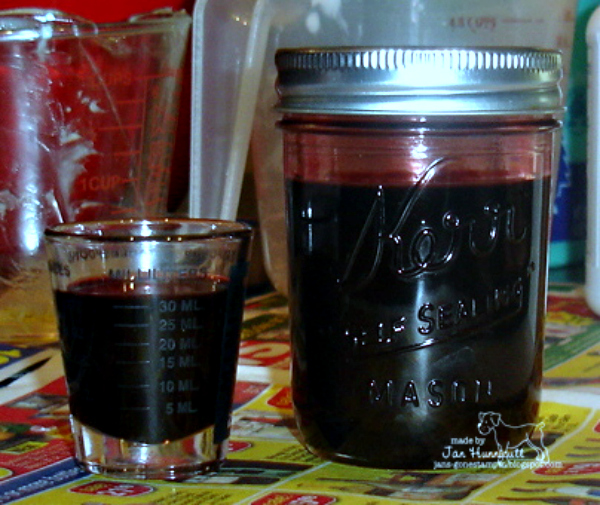
I grated my one pound block of homemade laundry soap using a cheese grater and weighed out 2.5 ounces, then measured out 1/2 cup of Washing Soda and 1/2 cup of Borax.  


While I was grating my soap I had 4 cups of Distilled Water on the stove coming to a boil.  When it started to boil I added it to the grated homemade soap and stirred till it was dissolved, then I added the 1/2 cup Washing Soda and stirred till it was dissolved, then added the 1/2 cup Borax and stirred till it was dissolved.     


I actually doubled the recipe for the liquid soap so it made three quarts of liquid laundry soap.  I set it aside to cool and went to work on the powdered laundry soap which actually uses the same ingredients and measurements but excludes the distilled water.


If you use the blender to mix the dry ingredients it makes a nice fine powder.  I did have to stop the blender and take the glass pitcher part off and turn it upside down a few times to help mix it.  A food processor would work well too I'm sure.  Maybe next time!


Here's the powdered laundry soap.

It's hard to see in my picture above but I noticed that my liquid laundry soap behind the blender was starting to separate.  Not a real big deal...  I figured I could shake it up before using it.  But when I put my silicon spatula in the jar to stir it up I had a solidifying white mass above the water, hmmm.

That got me to thinking I have the blender out so why not pour a jar out into the blender and see what happens...


Now I have liquid laundry soap the consistency of Cool Whip!  I wasn't sure what to do next with it so I let it cool and watched to see if it separated.  Ahhh Nope...  I suppose that's a good sign but wondered how it was going to work in the clothes washer.    


The next morning I had the idea to dilute the liquid laundry soap using a 1 to 1 ratio and mix it together with my stick blender.  


So I measured out 2 cups of laundry soap fluff to 2 cups of distilled water and mixed it with my stick blender.  Ok, that's about the right consistency now!  


After diluting all the laundry soap I poured most of it in an upcycled one gallon  vinegar container and the remainder in the empty gallon water bottle.  After letting it rest for about an hour I noticed it was separating.  I've been keeping an eye on it and trying to shake it up to mix it together again and it's working now.  I labeled my liquid laundry soaps "shake before using".  

The next time I make this I will adjust the recipe and experiment a little more.

The best part about this laundry soap experiment was I figured out the cost for my batch of liquid and powder laundry soap.  For $4.06 I have 1 1/2 gallons of liquid laundry soap and 3 pounds 5 ounces of powdered laundry soap.  Even though I had to put in some extra time to get the consistency right I think it was worth it!

Here are the recipes for you:

Powdered Laundry Soap
2.5 oz grated Lard soap
1/2 cup Washing Soda
1/2 cup Borax
Mix together in the blender or food processor for a good consistency.  
Use 2 tablespoons per load of laundry.

Liquid Laundry Soap
(the revised recipe)
2.5 oz. grated  Lard Soap
1/2 cup Washing Soda
1/2 cup Borax
7 cups boiling water (distilled)
Pour boiling water in bowl mix in Lard soap till dissolved, mix in 1/2 cup Washing Soda till dissolved, mix in 1/2 cup Borax till dissolved.  I'd let it sit till it's cool before pouring into containers to see if it separates.  If it starts to separate you could try mixing it in the blender...  I haven't needed a second batch yet so I'm not sure if my recipe revision is going to work.  Use 1/3 to 1/2 cup per load of laundry.  

The original recipe came from Cathy at Soaping 101 on You Tube.  I made laundry soap about 9 months ago from a different recipe for under $20.00 that you can find here.  I was happy with it, it worked well and lasted 8 months.  This recipe looked fun because I was actually "making" one of the components that goes into it, the soap.


If you'd rather not make your own Lard Soap for this recipe I have several bars for sale in my Sudz n' Hunni Soaps web store ready and waiting to help with your laundry needs!

I hope you enjoyed my adventure in making homemade laundry soap!


Friday, June 14, 2013

K n' K Designs Eagle


My card today is for Flag Day!  This cute digital image is from K n' K Designs, I "googled" her but didn't find her so I'm not sure if she's still in business.

This digital stamp set was part of a fund raiser in 2011 to help pay for postage for Operation Write Home's busy holiday season that year.

Happy Flag Day!

Thanks for visiting my blog -


Wednesday, June 12, 2013

Cuddly Buddly Love Birds


I have a fun card using a Cuddly Buddly digital image today for our Operation Write Home Stars & Stamps Midweek Throwdown challenge, themed "Birds".  I colored the love birds with Copic markers R22, R24, R27, Y13, Y15, Y17, B12, B14, R81, R83, R85, cut it out with a Spellbinders circle then matted it with a Spellbinders pinking circle die.  After that I cut two more Spellbinders circles, layered them and added them.  

Cardstock colors are Via Vellum Basic Black, Astro Brights Galaxy Gold, Turquoise, Stampin' Up! Pixie Pink and Copic X Press It.  I used two Papertrey Ink dies, double ended banners and a ric rac die for the edge of the turquoise panel.  "Tweetheart" is computer generated, I needed something for my double ended banner.  I also used two new to me Darice embossing folders.  

Thanks for visiting my blog today -

Challenges:

Tuesday, June 11, 2013

Handcrafted Natural Carrot Facial Soap


I've been working on new recipes for making cold process soaps, this Natural Carrot Facial Soap came out beautifully and feels great on my face. 

This particular recipe is a blend of Olive Oil, Coconut Oil and Castor Oil, Almond Oil, Avocado Oil, Camellia Oil and Emu Oil all chosen for their reported skin nourishing properties.

There's even a touch of Tussah Silk for it's ability to increase lather and it's luxurious feel. 

I chose these four essential oils because:

Carrot seed (Daucas carota) essential oil is said to  be best known for its skin-healing abilities,  
it's also said to be useful for eczema, psoriasis, skin ulcers, skin infections and in healthy skin to restore tone and to moisturize.  It has a carrot like fragrance too.


I chose Rosewood (Aniba rosaeodora) for it's reported  antidepressant, anti-inflammatory, antiseptic, anti bacterial and skin nourishing properties.

Sandalwood (Santalum album) is said to have moisturizing and antiseptic qualities as well as anti-inflammatory, astringent properties.

Lemon (Citrus limon) because it's said to be Antibacterial, Anti-fungal, Antiseptic, Astringent and detoxifying.   


I've been washing my face with this new soap for about a week now and I really like it!

If you'd like to try it too I have it for sale in my new Sudz n' Hunni Soaps web store.  A little side note about my new store...  I launched it early by accident so there are only a few items for sale so far.  As the handcrafted soaps I've been making are cured and ready I will be adding them to my store so there should be something new each week for awhile!

Monday, June 10, 2013

Copic Marker Tutorial


I took some time today to play with a Copic marker technique I like to use.  I watched a video that inspired me on how to do a bleaching technique with Copic Blending Solution, stamps, markers, air brush, etc.

The card above is my finished product, the Spellbinders Labels 14 is where I used this technique.  Instead of pulling out my air brush I used BG13 & BG15 markers.  I was in a hurry, I needed to clean up and fix dinner for my family.  It's a little streaked but I like the overall effect.


Here's a picture of the right way to do the technique.  Air brush with your markers BG13, BG18, BG72 onto a sheet of card stock.  Spritz your stamp with Copic Colorless Blender and stamp on the air brushed card stock.  I held my stamp down longer than I would have if I were using ink.  Be sure to clean off your stamp after each time you use it for a clean impression.  

One of the reasons I brought out my air brush system today is I was working on finishing my card and couldn't find a matching button to go on the tag I'd made.  Do you ever have that happen?  I used a small piece of foam tape to hold my button down to the paper I air brush on and sprayed it with several coats of BG13 and let it dry.  This works so much nicer than using a marker to color the button and dries much quicker too.  Another thing I tried today was using the BG13 marker to outline the edge of the Spellbinders tag, I went over it several times to make it darker.  I like the way it looks and think I'll try to remember to do this more often.

The stamps I used are actually rubber and acrylic stamps.  The dragon fly is by Stampendous, the flourish is by Kaiser Craft & the sentiment is from Papertrey Ink.  The dragon fly is colored with Copic markers BG13, BG15, BG18, BG23, V15, V17, T5, T3.  My layout was to accommodate the largest Spellbinders Labels 14 die, I also used a Spellbinders Oval and tag die.  The white panel is embossed with a Cuttlebug Swiss Dots embossing folder and I added straight lines in the center with my Scor-Pal.  

I hope you enjoyed my mini tutorial and are maybe inspired to try this Copic technique yourself.

Thanks for visiting my blog today -

Friday, June 7, 2013

Digital Delights by Louby Loo Little Dumpling & Stork


I have a Digital Delights by Louby Loo card to share today!
I used the digital stamp Little Dumpling & Stork, sentiment set Baby Sentiments & digital paper pack "Sweetheart".

Supply List:

ALL DDSTAMPS USED:  Little Dumpling & Stork, Sweetheart digital paper pack, Baby Sentiments
CS AND PAPERS:  Via Vellum Basic Black, Stampin’ Up! Rose Red, Copic X Press It, Mohawk Color Copy Bright White 110 lb
INK:  HP OfficeJet 6000, HP LaserJet
MARKERS (if any):  R85, R83, R81, E000, E00, E01, B000, Y15, Y13, Y11, YR04, E34, T0, T1
ACCESS. AND EMBELLISHMENTS:  Cheery Lynn Designs French Flair die, Papertrey Ink ric rac die

Thanks for visiting my blog today -

Wednesday, June 5, 2013

Lilyboo Designs Hogwash


My card today is for our Operation Write Home Stars & Stamps Midweek Throwdown challenge, we have a "Water" theme this week.

I used my Lilyboo Hogwash digital image.  This cutie is colored with Copic markers V12, V15, V17, BG01, BG000, B60, E50, R20, R30, R32, C00, C0, C1, C2, C6, W0, W1, YG01, YG03, YG13, YG17, YG93.  My layout is Operation Write Home's Sketch #116 from last Sunday and the papers I used are Stampin' Up! Almost Amethyst, Eggplant Envy, Sorbet Blue Ice, Via Vellum Basic Black and Copic X Press It.

This was a really fun card to make following a OWH sketch, I like how Julie has the measurements written on the Operation Write Home sketches for us so I don't need to print them out and measure anything.  I only added one extra element to the sketch with the Spellbinders tag for my computer generated sentiment, I couldn't help myself  (:   

Thanks for visiting my blog today -

Challenges:
Make It Monday - Anything Goes
Tammy's Scrappin' Corner - Anything Goes + Texture

Tuesday, June 4, 2013

Natural Soap Colorant Experiment


I just finished making a small batch of laundry soap from Lard, distilled water and Lye, poured it into a empty cleaned half and half container and till tomorrow for it to be hard enough to work with.  I'll  un mold and grate it up to make another batch of laundry soap for our family.  The last batch of homemade laundry soap I made lasted 8 months, not bad for a twenty dollar investment!

I decided since I'd already made a little mess maybe I should keep going and do an experimental one pound batch to test a natural colorant by using Alkanet Root powder infused in Olive Oil.


I have the lye and water cooling in the kitchen sink.


As the hard and liquid oils melt on a very low heat on the stove.


To infuse my Alkanet Root powder powder in Olive Oil I added one tablespoon to the oil in a 8 oz. mason jar.


I measured out the infused Alkanet Root in a one ounce shot glass type measuring glass.


While the melted oils were cooling in the sink - making cold process soaps I've been cooling my oils and lye to about 95 degrees before mixing them together.  They take a little longer to reach trace so I have more time to play and add colors, swirls, fragrances, etc.


The lye water was at 95 degrees and the oils were 99 degrees, time to pour them together slowly and stir with the silicon spatula.


Next I used the stick blender to get the soaping process going and reach a thin trace.


It's time to add the Alkanet Root infused oil...


Hmmm, that doesn't look purple to me it looks gray green!  That's ok, this is a one pound experiment so we'll keep going.  I added the fragrance sample at this point too, it didn't change the color.


Time to pour it into the silicon molds.  This first mold is a guest soap size that I bought at Amazon.com


Keep pouring, it's starting to get thick!


Ok, I've used up all the soap batter.  Now we wait to see what happens...


Where can you get the Alkanet Root?

Mountain Rose Herbs. A herbs, health and harmony c