Saturday, June 30, 2012

Happy Birthday


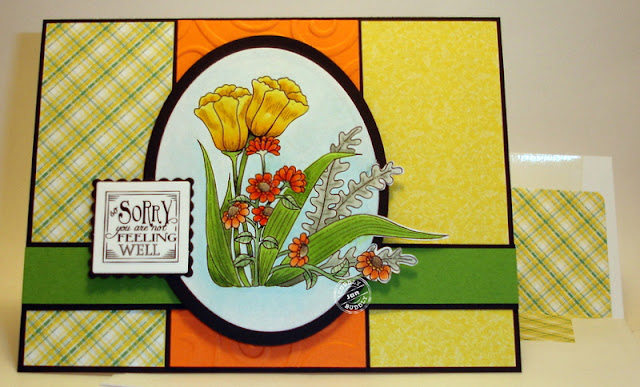
I have a gorgeous card to share with you today that I received from my friend Carol for my birthday today!

I don't know anything about the stamp but you can see more of her inspiring creations at her blog 

Happy Birthday to me, happy birthday to me :)

Have a good weekend -

Friday, June 29, 2012

Project Handmade Soap in the Crock Pot


It's Friday again and time to write about another of my crafty adventures, soap making in the crock pot.
Today I'm making Shampoo Bar soap.  Andrea has a recipe and tutorial on her blog on how to make it, I've purchased a couple of bars from her and LOVE it.  The shampoo bars are almost gone so I've decided to try out her recipe.  

Pictured above is the mess on the table after measuring everything into a stainless steel pan, melting it all together and adding it to the crock pot.  I didn't get photos of mixing the lye and water/coconut milk or the oils in the pan melting.  I guess I was kind of busy!


I picked up an old crock pot on E Bay for soap making.  I've read you should use one of the older crock pots because they don't get as hot on low temp.  After this one arrived I realized it was about the same age as the one I use to cook in, circa 1970.  


The lye solution and oils have been mixed together in the crock pot using a stick blender.  It didn't take long to reach "trace", the mixture is about the consistency of pudding.  Now it cooks on low for an hour...


Waiting for the hour to pass, I greased the "molds" with coconut oil.  You might notice my molds are loaf pans.  The soap is cooking and going through the gel stage.  It gets transparent from the outside to the center in about an hour.


At the end of the hour it's time to turn off the crock pot and stir in the essential oils of your choice.
I used Peppermint and Rosemary because my hair is dark in color and these herbs are beneficial to your hair.  As I stirred in the Peppermint essential oil, it warmed and cleared my sinuses.  Now the whole house smells like Peppermint!   When I was satisfied that all the essential oil was stirred in I spooned the soap into my molds.  I only used one loaf pan and a large mouth half pint mason jar.

The next step in the process is letting the soap set in the mold for 24 hours to cool and harden.  Then I can take it out of my molds and slice it into bars.  I've read you can use your Crock Pot hot process soap right away and I know we'll be using it soon!  After slicing I'll be storing it on wire baking racks to help it dry out and cure so it can become a hard bar of shampoo soap that will last a long time.


 Here's a photo of 24 (almost) hours later after slicing the loaf of soap into bars.

I've sampled my new shampoo bar and love it - it has great lather, a wonderful peppermint smell
and I have clean shiny hair -

I hope you enjoyed my first adventure in shampoo soap making!

I almost forgot to add a link to Andrea's blog for the recipe and tutorial I followed,
her blog is called Frugally Sustainable, enjoy.

Thanks for visiting my blog today -

Challenges:
Inspire Me Fridays - Anything Goes

Thursday, June 28, 2012

Digital Delights by Louby Loo Little Boy Blue


 Today's card is a Digital Delights by Louby Loo design team card using the digital stamp set Little Boy Blue.

It was a very fun image to color with my Copic markers:

Hat & Overalls:  B91, B93, B95, N5
Haystack:  Y21, Y32, E31, E34
Skin:  E00, E01, E11, E04, R21
Hair:  E31, E35, E37, Y21
Grass:  G20, G21, G28
Sky:  BG0000, BG01

My card layout is Operation Write Home Stars & Stamps sketch #116.  Cardstock colors are Neenah Patriot Blue Linen, Stampin' Up! More Mustard, Basic Grey scrap of patterned paper & Copic X Press It blending card.  

Be sure to stop by our Digital Delights by Louby Loo blog and see all the wonderful creations from our design team!

Thanks for visiting my blog today -

Challenges:
Splitcoast Stampers Ways To Use It #381 - Sweet Child Of Mine

Wednesday, June 27, 2012

Hambo Stamps Skating Monkey


We have a new Midweek Throwdown challenge at Operation Write Home Stars & Stamps starting today!
The theme of our challenge is Monkey's! 

For my card I used Hambo Stamps Skating Monkey digital image and colored it with Copic markers:  E00, E11, E30, E33, E34, E42, E43, E44, E47, E49, C00, C0, C1, G0000, B0000, B000, B00, B01, B02, B14, YG07, R20.  I was wondering what paper I was going to use to match up with my monkey and got lucky - Stampin' Up! Really Rust coordinated perfectly.  I used Nut Brown for matting and card base, the blue is ColorMates Pool and I used Copic X Press It blending card.  

My layout is Operation Write Home sketch challenge #126 that I hadn't had a chance to play with yet.  

I added texture with a Cuttlebug dots embossing folder, three Dew Drops and I stamped "Miss You" from a Papertrey Ink set in Memento Rich Cocoa ink.  The banner ends are also from Papertrey Ink's Double Ended Banner die. 

Hambo Stamps also has a new Hambo Hoedown starting today!  Use a Hambo Stamp and make a card that has a pocket of some type.  

I hope you'll have time to play in each of the challenges this week.

Thanks for visiting my blog today -

Challenges:

Tuesday, June 26, 2012

Hambo Stamps Garden Snail


I have a fun Hambo Stamps design team card to share with you today!

My inspiration came from Splitcoast Stampers Ways To Use It Challenge #380 and Pam Sparks whose card I saw on Splitcoast Stampers then linked to her blog for a visit...  and wow she makes beautiful cards!

Anyway, I colored this cute snail scene with Copic markers G20, G21, G24, G28, YG01, YG05, YG17, YG21, YG91, YG93, E40, E42, E43, B0000, B000, B00, V12, V15, V17, Y11, Y26, YR14 using my newly acquired Copic coloring skills from the Copic Intermediate class I took a few weeks ago.  I think my Garden Snail scene looks a little richer and vibrant than it might have before the class.  

The Ways To Use It challenge is to use a window or door on your card.  The cut out is totally a window.  I used foam tap on the underside to pop it up off the Garden Snail scene and give it depth.  Before I put it all together I carefully stamped Happy Trails, after lots of practice mind you!  

Are you ready for the new Hambo Hoedown tomorrow?!

Thanks for visiting my blog today -

Challenges:
Splitcoast Stampers WT#380 - Windows and/or doors
Incy Wincy - Anything Goes
Love To Create - Anything Goes
Make It Monday With Kraft Outlet - Anything Goes
Paper Playtime - Anything Goes with a Sentiment

Monday, June 25, 2012

Cuddly Buddly Lilyboo Designs Cupcake Love


I have  Lilyboo digital images to share with you today!
For my card I merged Lilyboo's Cupcake Love and Lilyboo's Spring Bench digital images to make a scene and colored it with Copic markers.

I thought this scene would be a nice way to practice my new skills from the Copic Intermediate class I took a week ago.  The first example is we learned how to color an image similar to the tree on my card.  Another noticeable thing would be the greenery under the bench actually looks like it's under and behind the bench, the greenery on the tulips do too.  I worked on my cast shadows around the image for added interest and Lily really looks like she's sitting on the bench instead of being part of the bench, lightening her hair a little with Y21 made a difference there!  Can you tell what color her socks are?  They're supposed to be white so I lightly shaded them with the lightest green I used in the greenery below her G20.  I added a Quickkutz die cut sun to the upper right corner to help complete my scene and show my light source.  Then added dots of Y11, Y13 & Y35 radiating outward for sunshine.

After I'd walked away for awhile I came back and made the Happy Birthday sentiment on my computer and cut it out with a Stampin' Up! Word Window punch.  It took a few tries to find just the right spot for it.  I knew I wanted it on the left side of my card toward the bottom to possibly three quarters of the way up.  I moved it up and down and settled on right where it is now.  After looking at the card to see if I was "done" I realized there is that triangular shape on it that draws our eye around the card.  Can you see it?  If you drew a line from one bright yellow item to another on my card front you'd end up with a triangle.  Hmmm... funny the things we do to balance our cards without thinking about it or maybe knowing why?

Now I have a question for you!  
Can you see the big mistake on my card where I thought I might have to throw it away and start over?


As I was coloring I was going to add a cast shadow to the left side of her dress using B91, starting light and if it needed more I'd try B93.  Before I left for Las Vegas last week I filled several of my Copic markers or should I say over filled!  I didn't even get the chance to touch the marker tip to the paper before it dripped, oh no!!  I dabbed up what I could with a dry cotton ball that was on the table and let the rest dry.  I was able to remove some of the blue with my blender marker pushing it onto the cupcake wrapper I hadn't colored yet, then I just worked it the best I could using the R81, R83 & B93 markers.  Quite a cupcake shadow now that I've drawn your attention to it!  That's one of the things I really like about Copic markers, you can usually fix mistakes...  

Here are the Copic markers I used:  

Dress: R81, R83, R85, B91, B95
Bench:  E53, E25, E29, E99
Tree:  E31, E35, E47, YG01, YG03, YG25, G46
Dark Greenery:  G20, G21, G24, G46
Tulips:  Y00, Y11, Y13, Y35
Cupcake:  R89, R83, B91, B41
Hair:  E33, E35, E37, Y21 
Skin:  E00, E01, E11, R20
Background:  B0000, B01
Sunshine:  Y11, Y13, Y35
Shoes:  N1, N3, N5
Socks:  G20

The card stock colors are Stampin' Up! Garden Green, Nut Brown, Astro Brights Galaxy Gold and Copic X Press It blending card.  Everything but the Copic X Press It was in my scrap pile beside my paper trimmer, I love it when that happens!

Thanks for visiting my blog today -

Challenges: 
ATC's & Cards With Attitude - Anything Goes
Cardmadfairy's - Girly
Inspire Me Friday's - Anything Goes
Stampin' For The Weekend - Show Us Your Style, Clean & Colored
The Corrosive Challenge - Summertime Girls
Sentimental Sunday's - Cute & Girly
That Craft Place - It's All Green
Make It Monday - Anything Goes

Friday, June 22, 2012

Project Homemade Lip Balm - Notes From Home

School's out & the kids are home with Mom for 10 weeks!
I've been trying to have something fun the kids and I can do together each Monday that's a little crafty too!
You might not know this about me but - I have some "other" crafty interests too...

This last Monday we made homemade lip balm -


Our supplies:  kitchen scale, double boiler, lip balm tubes and filling tray, bees wax, cocoa butter, shea butter, grapeseed oil, vitamin e oil, orange essential oil & honey from the bee farm across the street. 


The bottom part of the double boiler, heating the water.  I've had this glass double boiler for years and years, I haven't used it but kept it because it was my Mom's and it looks neat.  I have a feeling it's older than I am.  After today I can say it works great too! 


We have the two pieces of the double boiler together now with our lip balm ingredients melting inside.


All ingredients have melted and blended together, now I've changed containers hoping it will cool to about 120 degrees.  The double boiler doesn't have a pour spout and I thought that might be helpful.


This is the lip balm filling tray with 22 lip balm tubes ready and waiting.


Here we go, oh oh, I think we need more lip balm tubes!  Quick grab the bag Michael, lol!


Now we have 50 lib balm tubes attached to the tray and filled (for the most part).  I can see two that don't have anything really in them...


A side view, I can see that not all the tubes filled.  It will be interesting to see how many complete tubes we have when we take them out of the tray.  


Here's our finished lib balm.  I decided to order labels so I can give them as gifts.
This is just my prototype label to see how it would work and if labeling was worth it. The actual labels are for ink jet printers and waterproof.  Might be cool!

Most of the supplies and recipe to make lip balm came from Elements Bath & Body.com
I added a teaspoon each orange essential oil and raw honey as extras.  

Thanks for visiting my blog today -

Thursday, June 21, 2012

Digital Delights by Louby Loo UPASSED


I have a Digital Delights by Louby Loo design team card to share today using the You Passed digital stamp set.

Supply List:

ALL DDSTAMPS USED:  U Passed digital stamp set
CS AND PAPERS:  Bayou, Solar Yellow, Coral, Black, X Press It
INK:  HP LaserJet
MARKERS (if any):  Copic E34, E30, E31, E51, E53, E04, E09, E25, E29, E11, E00, E01, YR21, Y21, YR24, B24, B12, B00, C00, C1, C3, C5, C7, Y17, YR07, B0000
ACCESS. AND EMBELLISHMENTS:  We R Memory Keepers Corner Chomper
COLORING MEDIUM (if any):  Copic markers

I hope you'll stop by our Digital Delights by Louby Loo blog to see all the wonderful inspiration by our design team!

Thanks for visiting my blog today -

Challenges:
Try It On Tuesdays - Anything Goes

Wednesday, June 20, 2012

Hambo Stamps Harvest Moon


I have a fun Hambo Stamps design team card to share with you today!
I used the rubber stamp Harvest Moon for my image and the rubber stamp sentiment "No Cracks" by Hambo Stamps.  

The Hambo Hoedown starts today too!
The challenge is to choose any technique from the Splitcoaststampers Resources Page to make your Hambo Stamps project. You'll need to list the name of the technique (as SCS labels it) and link the resources page in your blog post. http://www.splitcoaststampers.com/resources

I actually made my card for the Operation Write Home Stars & Stamps Midweek Throwdown challenge, the theme is a color challenge.

I stamped my image on Copic X Press It and colored with Copic markers.  My grass and lower part of the sky is done using Isoprophyl Alcohol on a Q Tip swab and YG11 & BG000.  I used my cloud template for the clouds and the BG000 marker.  The card layout is Operation Write Home Stars & Stamps sketch #52.  I added the Quickkutz die cut sun to balance the layout as well as three black half pearls.

This was a super fun card to make, the only trouble I had was stamping my sentiment straight - I'm out of practice - after numerous attempts I got it!

I hope you'll have time to check out and play in both challenges this week!

Thanks for visiting my blog today -

Challenges:
Operation Write Home Stars & Stamps - Color Challenge
The Cheerful Stamp Pad - In The Garden
Celebrate The Occasion - Welcome Summer

Tuesday, June 19, 2012

Copic Intermediate Certification


I wanted to check in today and tell you a little about the Copic Intermediate certification class Dagmar and I went to in Las Vegas.  What fun!  Our instructor was Colleen Schaan.  This class was from 9:00 AM to 8:00 PM with a break for lunch and dinner, the day flew by!  Colleen is a wonderfully fun, animated, personable and just down right cute personality!

I learned more about light source and how to use the light source templates from Marianne Walkers Shadows & Shading book.  I also learned about cast shadows and how to use them in my Copic coloring.  Colleen challenged us to step out of our comfort zones to the next level of Copic coloring, I can't wait to practice, practice, practice everything I learned!

If you've been thinking about taking the Copic Intermediate certification class I highly recommend it.  And, if you're lucky enough to have Colleen Schaan in your area as an instructor it's a guaranteed good time!


My crafty friend Dagmar brought along her Copic Coloring Guide by Colleen Schaan and Marianne Walker to have it signed by Colleen.  I'd heard about the book but hadn't looked at it, after taking this class and meeting Colleen I had to have it too.  Amazon.com here we come!

In review Dagmar and I had a great three day weekend in Las Vegas, and you know what they say...
what happens in Vegas stays in Vegas...

Thanks for visiting my blog today -

Monday, June 18, 2012

Cuddly Buddly Lilyboo Designs Piggy & Pal


I have a fun Cuddly Buddly Lilyboo Designs card to share with you today!

Our family has a thing about pigs lately -

I colored this cute Lilyboo Designs image called Piggy & Pal using Copic markers.  She's very pink because I was doing my best to match my Patchwork of Papers Pink digital papers also by Cuddly Buddly.  Copic markers:  G20, G21, G24, G28, C0, YG01, YG03, YG25, R000, R81, R83, BV000, BV01, BV02.  

My layout is Operation Write Home's sketch challenge #122 I've been dying to try.  The only problem with this sketch is there isn't anywhere to put a sentiment so...


I played a little in Photoshop Elements to digitally decorate, layer and print the inside of my card using Scripture Ticket Sentiments  and the digital papers.  You could write a note on the patterned paper but I think it's more of a card that would have a letter enclosed.

I hope you enjoyed seeing my card as much as I enjoyed making it!

Thanks for visiting my blog today -

Challenges:
Creative Monday's - Summer
Make It Monday - Anything Goes
Truly Madly Crafty - Monochrome

Sunday, June 17, 2012

Happy Father's Day!


Happy Father's Day!

I'm pre-scheduling my blog post from our hotel room in Las Vegas, it's actually Friday night!

I wanted to share the Father's Day treat I made for my husband who's home with our kids, I'll need to call him later and give him scavenger hunt directions so he can find it and his card.


Here's a view of the other side of the jar.  

Thanks for visiting my blog today!

Friday, June 15, 2012

School's Out & We're Having Fun Keeping Busy


The kids and I have found a new crafty hobby that I hadn't tried yet, Loom Knitting.
My daughter Jenny took a knitting class in school this past year and wanted to buy some yarn for a project to keep herself busy.  We went out looking and came home with a round knitting loom and some yarn.  She's working on a hat between playing video games and visiting with her friends, her project is on the pillow beside her.  I've made two so far, I ah don't play video games.  The kids are modeling them here for us.


This is a photo of the first hat in the process.  I had to go to You Tube to figure out how to use the loom, the directions that came with it were upside down and left handed for me.  I'm a visual learner...  

I have a feeling I'll be working on one of these today riding in a car!
My friend Dagmar and I are heading to Las Vegas soon for a Copic Intermediate Certification class and taking a long weekend get away.   My husband and kids will be taking care of each other at home till I return.

Thanks for visiting my blog today -

Thursday, June 14, 2012

Digital Delights by Louby Loo Claudia Cow


I've been playing with Spellbinders dies and Digital Delights by Louby Loo Pre-Colored digital images today.  This was a quick, fun card to make, no coloring required.

This cute image is called Claudia The Cow and she has the sentiment you see with her, pretty cute!
This die is a little smaller than an A2 sized card but will fit the envelope nicely so it's going into my Operation Write Home box.  I have a supply list for you below:

CS AND PAPERS:  Nut Brown, Via Vellum Scarlet, Mohawk Bright White
INK:  HP OfficeJet
ACCESS. AND EMBELLISHMENTS:  Spellbinders Lattice Rectangles, Ovals, Tags Trio & Cheery Lynn Designs Buttons die, Crochet thread

I hope you'll stop by our Digital Delights by Louby Loo blog today and check out the fabulous design team creations!

Thanks for visiting my blog today -

Challenges: 
Craft Your Passion - Anything Goes
Forever Friends - Anything Goes

Wednesday, June 13, 2012

Hambo Stamps Dirty Bird


This is my first Hambo Stamps design team card using a Hambo RUBBER Stamp, if you've read my blog for awhile you know I don't use many rubber stamps anymore.  I discovered digital stamps/images and haven't looked back.  

For the first two months of my design team term I'll be using Hambo RUBBER Stamps, how fun!  When I received these in the mail before I opened the package I was hopping I didn't have to cut them out, I was very pleased to see they were nicely trimmed and ready to mount on an acrylic block, yes!  I even felt the need to re-ink my Memento Tuxedo Black ink pad for best results...  talk about neglect!  I stamped a few practice runs on copy paper to get the feel again and stamped the final image on Copic X Press It and went to work coloring.  I feel the need to add that I was really impressed with how beautifully this image stamped, very crisp and clean - I like that!  

As I said before I went to work coloring the cute Dirty Bird image with Copic markers:

              G0000          YR02          YG01         V12          B0000          T0          W3          E40
              Y11              YR04          YG05         V15          B000            T1          W5          E41
              Y13              YR07          YG25         V17          B16              T2                         E42
              Y15              YR09          YG45                          B14              T3
              Y17              YR16

My papers are from the Cosmo Cricket De Lovely paper pad.  I also used 5/8" grossgrain ribbon, a translucent yellow button from my stash and a little crochet thread.  

I also used Hambo Stamps "Little Cheaper" sentiment on the inside of my card, nothing fancy because I forgot about using it after I got going on my card!


My card today is also for our Operation Write Home Stars & Stamps Midweek Throwdown challenge, our theme is "Things With Wings".

And... be sure to check out the Hambo Hoedown, the new challenge starts today!

Thanks for visiting my blog today -

Challenges:
Operation Write Home Stars & Stamps - Things With Wings
Fashionista Challenge - Simply Summer
I Brake For Challenges - Summer Fun
Lia Stampz - Things With Wings
Southern Girls Challenge - Things With Wings
Raise The Bar - Hello Summer
The Cheerful Stamp Pad - In The Garden
Make It Monday - Anything Goes

Tuesday, June 12, 2012

Homemade Copic Carrying Case


I have a fun project to share with you today!

I'm going to a Copic Intermediate Certification class in Las Vegas this weekend and didn't want to take all my Copic markers.  I received an e mail from Copic with a list of the markers we'd be using if we'd like to bring our own, who wouldn't love to use their own?! 


I've been collecting Crystal Light containers, my daughter who's 12 years old picked out the fancy Duct tape for me.  The only other thing I used was double faced foam tape to stick the Crystal Light containers together before I wrapped them all in Duct tape.

I saw a container like this a lady had made when I was in Phoenix for a Copic class last year and thought it was pretty neat.  Her handles were attached a little different,  living in a very small town I couldn't find the fasteners so I had to make do. 

I think it will hold my Copic markers and the few little extras like my glasses and cotton balls and a very small bottle of Isoprophyl Alcohol nicely.

Thanks for visiting my blog today!

Monday, June 11, 2012

Cuddly Buddly Lilyboo Designs Let's Go Camping!


It's Monday and time to post a fun card using Cuddly Buddly Lilyboo Designs Let's Go Camping digital stamp/image.  I also used a digital paper pack from Cuddly Buddly called Garden Vignettes - Cool and their Bits of Ivory Sweet Summer Sentiments set.  

I LOVE this digital paper pack, you'll have to go check it out here, the colors and patterns are wonderful!
The layout for my card is a sketch that no longer looks like the sketch, the inspiration was enough to get the creative process flowing for me.  

To create the banner strips I used a square punch to make the cut out indentation on the ends.  I also used Spellbinders Circles to cut out the sentiment.  I colored this cute image with Copic markers and regret to tell you I can't find the paper I wrote all my info on...  We had company for dinner and I needed to clean off the kitchen table and now it's just gone!  

Thanks for visiting my blog today -

Challenges:
Splitcoast Stampers Ways To Use It #378 - Return of the Banner
Paper Crafting Journey - Colour It Up
Pile It On #24 - Let's Get Outdoors
Sweet n' Sassy - Back To Nature
Crafty Catz - Summertime
Raise The Bar - Hello Summer
C.R.A.F.T. Challenge - Male Card
Digi Doodle Shop - Male Card

Friday, June 8, 2012

School's Out Week Two


School's out week two day one...
I've heard "I'm bored" a couple of times so far but I've been doing my best to find fun things to keep our 10 & 12 year old kids busy.  I've been giving them a small list of chores to do each day so our house doesn't look like...  well you know!  

Monday we went to work making peanut butter dog treats for Maxine.  
Pictured above is Maxine cleaning the peanut butter jar while Jenny holds it for her, Michael had the cleanest hands so he is taking the picture for me.


We took turns mixing up two double batches, rolling the dough out and cutting them out with bone shaped cookie cutters.  This is one of the cookie sheets full of all the treats when we were finished.


As we were working on these one of our discussions was if we were saving any money making these ourselves.  The kids didn't think so and were getting a little distracted with full cookie sheets waiting for the next batch to come out of the oven.  When it was all said and done we brought out the kitchen scale, set it to zero with an empty cookie sheet on it then weighed the full one to get an accurate reading.  We were surprised to have 5 lbs 13 oz of peanut butter dog treats! 

Our investment:
2 hours time together - priceless
40 ounce jar creamy peanut butter ( Maxine & kids licked the last 1/4 cup from the jar)  - $5.00 from a $5.00 Friday special at Safeway
8 cups whole wheat flour - from our pantry
4 tablespoons baking powder - from our pantry
32 ounces of 2 % milk - @ 1.57 a gallon on sale at Safeway

I packaged the treats in mason jars and sealed them with my Food Saver.  One half gallon jar left on the counter for Maxine's snacking pleasure and two half gallon mason jars in the freezer for later.


A job well done kids!

The recipe for you:

Ingredients:
2 cups whole-wheat flour
1 Tablespoon baking powder
1 cup peanut butter
1 cup low-fat milk

Bake at 375 degrees for 20 minutes. 
Thanks for visiting my blog today -

Thursday, June 7, 2012

Pollycraft Tribute


It's the day before we'll be saying goodbye to Pollycraft, I'm sad to see them go but understand everything changes.  Luckily I have several Pollycraft images to play with!
My blog post today is to pay tribute to Pollycraft and say I've loved your images.

Edited to add...
 Good News for Pollycraft, Little Miss Muffet will be selling Paula's images!!  You can read about it in this post http://pollycraftdesigns.blogspot.com/2012/06/cat-is-out-of-bag.html

Pollycraft is having a Farewell Linky Party, inviting everyone to share their Pollycraft cards new or old in new blog posts, here's the info you'll need if you'd like to play:
Celebrating Pollycraft in the form of a LINKY PARTY!!
the party will last until the shop closes on the 8th June...
and is really just a way for customers, fans, DT members and anyone else to share their Pollycraft creations... with everyone else!

There are no rules as such, and no set theme either...
unfortunately there arent any prizes... its just for fun.
consider it way to show off your blog, and to discover new blogs...
projects don't need to be new... you are welcome to share an older project thats your favourite!!
please share it in a new post though, and mention the linky party!
(no backlinks please)
My second card is a recent Pollycraft image that was on my blog last month.
A fond farewell and best wishes Pollycraft!
Thanks for visiting my blog today -
Challenges:
Pollycraft - Farewell InLinkz Party

Digital Delights by Louby Loo Mr. Tikki


It's new release day at Digital Delights by Louby Loo!
My assigned image is called Mr. Tikki, I also used a newly released coordinating digital paper pack and sentiment set in the Luau collection.

Supply List:

ALL DDSTAMPS USED:  Mr. Tikki, Luau Sentiment Set
CS AND PAPERS:  Luau Digital Paper Pack, Via Vellum Basic Black, Stampin’ Up! Only Orange, Copic X Press It
INK:  HP LaserJet, Copic
MARKERS (if any):  Copic E30, E31, E33, E13, E23, E43, E44, YR04, YR07, YR09, B02, B05
ACCESS. AND EMBELLISHMENTS:  Stampin’ Up! Oval Punches,
COLORING MEDIUM (if any):  Copic markers

Stop by Digital Delights by Louby Loo today to see the entire new release.

Thanks for visiting my blog today -


Challenges :
Try It On Tuesdays - Anything Goes

Wednesday, June 6, 2012

Hambo Stamps Snorkel Boy


My card today is for the Hambo Hoedown, it's my first card as a Hambo Stamps Bacon Bit!
The challenge today: It's a sparkling sea adventure for SNORKEL BOY! Glitter, Stickles, atyou Spica pens, glittery embossing powders, etc. - It's all about the SPARKLE as we dive into the depths of the sea.

BONUS OINKS for those that use one of the Father's Day sentiments and still have a masculine card with sparkle!

I colored Snorkel Boy with Copic markers B12, B0000, G0000, BG0000, Y13, Y15, R24, R27, R20, YR61, YR65, YR68, E81, E84, E70, E71, E74, E000, E00, E11.  I used Stickles Ice and Glossy Accents on my card in the bubbles, extra bubbles and his face mask as well as fish fins.  I wish my sparkle showed up better though! 

The layout for my card is the Sweet Stop Sketch challenge #160.  I made my own paper using Copic X Press It, Isoprophyl Alcohol and B12 Copic refill then dropping drops of Copic colorless blender on the paper after the ink was dry.  I was going for the ric rac looking like sea weed but I'm not so sure I "feel it".  I think that's just the way it is when you are making something really important instead of just playing in a challengeThe ric rack is a Papertrey Ink die and the button is a Cheery Lynn Designs die.

I hope you'll join us over at the Hambo Hoedown this week and play along.  Be sure to stop by and see all the fabulous design team creations using Snorkel Boy!

Thanks for visiting my blog today -

Challenges:
Hambo Hoedown - Sparkle
Fashionista Challenge - Simply Summer
Forever Friends - For The Boys + animal
Papertake Weekly - Anything Goes

Tuesday, June 5, 2012

Pixie Dust Studio Walter & His Pup


I have a just for fun card to share using the Pixie Dust Studio Walter & His Pup digital image.  

They are colored with Copic markers W0, W1, W3, W4, T3, R20, B0000, B02, B05, E000, E00, E11, E41, E42, E43, YR21, YR24, Y21, YR04, YR07, YR09, YG05, YG25, YG23, YG13.  I used I Heart 2 Stamps May sketch for my layout, a little late for that challenge but still great inspiration!

As I was working with the green panel of paper I changed my mind.  I'd colored a scrap of Copic X Press It with YG13 and colored in the dots with B05, the dots didn't match Walter's shorts the way I wanted them to so I grabbed a couple of my hole punches and went to work.  As I was punching holes I realized my card would qualify for Splitcoast Stampers Ways To Use It #377, Let's Get Negative challenge.  
I love it when that happens!

Thanks for visiting my blog today -

Challenges:
Splitcoast Stampers - WT377 Let's Get Negative
Digital Tuesday - Anything Goes
Tuesday Throwdown - Friendship
Fashionista Challenge - Simply Summer
Forever Friends - For The Boys
Make It Monday - Anything Goes

Can You Digi It Disgruntled


You might need your sunglasses for my Disgruntled Pig today!
I'm trying out new color combinations for pig skin, a.k.a. swine flesh...

Copic markers are my coloring medium of choice, I combined E93 and RV23 for the pig skin.  It actually matched Stampin' Up! Cameo Coral cardstock beautifully.  The other Copic markers used are:
Y11, Y21, W0, B21, B23.  Other papers - Stampin' Up! Ballet Blue and Bazzill Lemon.

The reason for my card is the Can You Digi It challenge that starts today, the theme is "button it up" so I used a Cheery Lynn Designs button die.  My layout is a sketch from Merry Monday, I really like their sketches and discovered that Merry Monday is a Christmas Card Sketch challenge.  

I also used an old Stampin' Up! French Script background stamp to mimic the script around the pig.  I couldn't come up with another color for that band so I used Copic markers on a scrap of X Press it then stamped over it when the ink dried.  I think I'd like to play with this sketch a little more!

Thanks for visiting my blog today -

Challenges:
Can You Digi It - Button It Up
LEJ Designs - Button It

Monday, June 4, 2012

Cuddly Buddly Lilyboo Sweet Meadow Corner


I have a fun card to share with you today using a Cuddly Buddly Lilyboo Designs digital image called Sweet Meadow Corner.  This digital stamp/image is made for a corner, I'm totally inspired by the image and wanted to color it but wasn't sure how I was going to use it in a layout in a corner.  I came up with the next best thing for me...  the out of the box technique!  I have to tell you it wasn't as easy as I thought it was going to be, the little leaves I needed to cut out were a challenge but you know I like challenges. 

I colored the Sweet Meadow Corner with Copic markers Y13, Y15, Y17, YR61, YR65, YR68, YR04, YR07, YR09, YG01, YG03, YG23, YG25, YG63, YG67, BG90, BG93, BG96, BG000, BG0000, E42, E43, E44.  I used a package of Cuddly Buddly digital paper called A Patchwork of Papers - Yellow printing two swatches on an 8 1/2" X 11" sheet of 70 lb. text weight white paper.  The cardstock colors are Via Vellum Basic Black & Leaf Green and Stampin' Up! Only Orange.  For the out of the box technique I used Spellbinders Ovals dies, the Cuddly Buddly sentiment from the Sugar & Spice sentiment set is cut out with a Spellbinder Square die and the smallest Spellbinders Eyelet Square die because I don't have the scalloped square dies, yet.  The Only Orange panel is embossed with a Cuttlebug D'Vine Swirl embossing folder.  I also had just enough patterned paper to make an envelope liner to match my card and make it feel a little more special.

Thanks for visiting my blog today -

Challenges:
Crafty Sentiments - Anything Goes